Quantcast
Channel: Rak's Kitchen
Viewing all 1220 articles
Browse latest View live

Kashmiri naan recipe | Kids recipes

$
0
0
kashmiri-naan-recipe
I had kashmiri naan only twice before. That too it came along the naan basket and it ended up in my plate once and only the second time, I somewhat felt like having something sweet and had a wish to eat Kashmiri naan. Honestly I have no idea about Kashmiri cuisine, so I don’t even know if this is really a Kashmiri cuisine or the restaurants developed this recipe and named it so since this is sweet. But this sure is a great tasting naan recipe, kids as well as adults will sure love this. I mostly make no yeast naan, but I tried adding yeast in this recipe. I was not very confident if I could bring the same taste and also worried how it will be rolled out without messing it. But trust RaksAngel, this is so easy and rolling part is not at all tricky. Comes out neatHappy. Stays soft, so pack it for your kid. I made it with maida, if you want you can try with atta too. Not sure about the texture, but I guess it would be nice too.
kashmiri-naan-recipe1

Kashmiri naan recipe

Recipe Cuisine:Indian  |  Recipe Category:Lunch/ Dinner
Prep Time: 2 hrs dough resting time    |  Cook time: 30 mins    Makes: 4

Ingredients

For the dough

Maida 1 cup 
Milk 1/4 cup 
Curd/ Plain yogurt 1/4 cup 
Instant yeast  1/2 tsp 
Baking powder 1/4 tsp 
Baking soda 2 pinches 
Sugar 1/2 tsp 
Oil/ melted butter 1 & 1/2 tblsp 
Salt  As needed

For stuffing

Badam15
Cashew nuts6
Glazed cherries10
Sugar3 tblsp (or as needed)


Method

  1. To make the dough, first place the flour in a mixing bowl. Add yeast, sugar, salt, baking powder, baking soda to it and mix well.Make a dent in the middle. Add curd, milk and oil.
  2. 1-mix
  3. Gather together to make dough and knead well for 5 minutes until smooth. Keep aside for 2 hrs atleast.
  4. 2-knead
  5. Keep covered leaving enough space for the dough to rise and cover the mouth of the bowl with cling wrap or lid. Let it be a warm space. The dough would have risen and doubled in volume.Punch down and knead again to make it smooth.
  6. 3-punch
  7. Soak badam in warm water for an hour and peel off the skin. In a blender, coarsely grind the glazed cherry, sugar, badam and cashews. Set aside in a bowl.
  8. 4-grind
  9. Divide the dough into 4 equal sized balls. In a well dusted counter top, use your hands to spread the dough into a small disk.
  10. 5-flat
  11. Spoon 2 tblsp of the ground sweet mixture. Cover and pinch the ends together as shown in the picture.
  12. 6-stuff
  13. Again dust and roll out into thick, oblong naans. While rolling, if the naan shrinks back, drizzle some oil in the counter top and again roll out.  Flip and roll both sides for even distribution of the mix throughout the dough.
  14. 7-cook
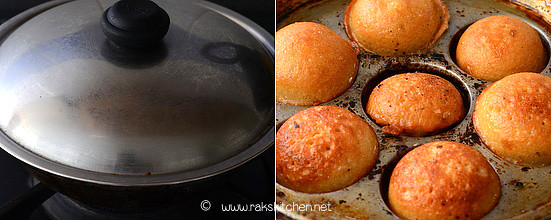
  15. Heat a pan and cook the naan in medium flame. You can cook covered to make it puff up as it makes the naan soft.
  16. 8-cook
  17. Flip and butter if desired and cook until brown spot appears here and there. Cook in low to medium flame for even cooking.
  18. 9-ready

Notes

    • Please adjust the sugar according to suit your taste.
    • Add nuts just as mentioned, too much of badam or cashew will give a raw smell otherwise.
    • You can add red food colour too along with this stuffing to make it more colourful.
    • You can make this without yeast too.
    • Important: I have used Instant yeast here. It is used less in amount than the other yeasts. Also it can be directly added to the flour without dissolving. If using active dry yeast, please dissolve 1 tsp(for this recipe) of the yeast in lukewarm milk along with sugar, wait for 10 minutes to froth and then use this to make dough along with curd and oil, otherwise recipe and everything same. You can ask me if you have doubts regarding yeast.
This naan stays soft even after cooling down. So its perfect for kids lunch box. We eat this as such. I am not sure which side dish will be apt for this.
You may also like : Naan without yeast  |  Nutella chapathi    |    Butter Kulcha

Kashmiri-naan


Thinai sweet paniyaram recipe Foxtail millet recipes

$
0
0
foxtail-millet-recipe
Yes, you heard it right! Me too joined the club of sirudhaniyam / millets, after my parents bought me these during my recent India visit. My mom started using siruthaniyangal as she wanted to change her eating habits coz of her health issues. So she asked me too to include these in our cooking and bought me these. My dad packed everything with a piece of handwritten paper with the millets name in each so that it can be easily identified. Sure it is looking very similar to each other. I was very much worried before handling and cooking these millets, but its not complicated at all. Taste also better than the oats Winking. Not comparing them, but just saying. So far I have made only this paniyaram and upma with barnyard millet (kuthiraivali). I loved the upma too, it was just like arisi noi upma. Soon will post the upma, which is easy and basic to cook. Now this flavorful thinai sweet paniyaram.
thinai foxtail millet recipes


Thinai sweet paniyaram (Foxtail millet) recipe

Recipe Cuisine:Indian  |  Recipe Category:Breakfast
Prep Time: 2 hrs soaking + 2 hrs standing     |  Cook time: 15 mins    Makes: 10

Ingredients


Foxtail millet Thinai 1/2 cup 
Rice flour  3 tblsp 
Wheat flour  3 tblsp 
Jaggery 1/4 cup heaped 
Grated coconut 1/4 cup 
Salt  A generous pinch 
Sesame oil and ghee As needed 
Cardamom 1 
Cooking soda 1 small pinch 

Method

  1. Wash once and soak the millet for 2 hrs. Place it in a blender with very little water, as it gets water after grinding easily if water is more. 1-soak
  2. Grind smoothly and transfer to a container. Add powdered jaggery, rice flour, wheat flour, coconut, salt and powdered cardamom seeds. 2-grind
  3. Mix well and set aside for 2 hrs. After 2 hrs mix well again, add a pinch of cooking soda and heat the paniyaram pan, pour 1/4 tsp oil in each shallow and pour this batter. 3-stand
  4. Cook covered in medium flame for 2 minutes. Flip and add more oil or ghee and cook until it turns golden brown. 4-cook

Notes

    • You can add half a banana too to this batter to make it softer.
    • Make sure the batter is not water or too thick. If watery, you may not be able to take from the paniyaram pan. If too thick, inside will not be cooked. So adjust the consistency.
    • To make the runny batter thick, you can add more wheat flour.
    • Sesame oil and ghee makes it smell awesome, so its recommended.
    • Giving standing time makes the paniyaram softer.

This paniyaram slightly has the thinai’s flavor, which very well goes with jaggery. Enjoy hot!

thinai-sweet-paniyaram

Semiya biryani, Thayir semiya, masala vadai - Lunch menu 41

$
0
0
semiya biryani recipe / vermicelli biryani

I am back on track and here I am with my lunch menu41 for the lunch menu series. This has been in my mind for long time, so made this today. This can be a brunch, lunch or you can make for dinner too. Easy and interesting to make as its different from the regular cooking. I thought of posting atleast some breakfast menus to keep the blog lively when I went to Chennai, but I don’t know if there wasn’t any exiting menu to click or I just was enjoying my break, the one month just flew like a minute. So I could post only 2 posts per week which I kept ready and had to forget my space other days. Last week itself I thought of posting a lunch menu or a breakfast menu as Vj’s friend came over for stay, but just forgot. Today also I cooked, clicked, finished eating and was deep into a movie that I forgot to post. Then Vj had to remind me to post. Out of touch and routine you seeBig Grin. So here is the lunch menu with Semiya biryani (vermicelli biryani) thayir semiya (curd vermicelli) and masala vadai. Scroll down for knowing how I prepared this menu and for the recipe links and other ideas.

Semiya Biryani, curd semiya, masala vadai - Lunch menu 41

Recipe Cuisine:South Indian  |  Recipe Category:Lunch
Prep Time: 3 hrs soaking    |  Cook time: 1 Hr 30 mins    Serves: 3
  1. On wake up or after your breakfast works are over, soak dal (3 hrs) for masala vadai.
  2. Chop vegetables for biryani, keep aside. Peel garlic, slice 2 onions – one for biryani, one for raita. Chop one onion finely for masala vadai.
  3. Keep other ingredients like green chillies, mint & coriander leaves, (carrot & pomegranate) for thayir semiya, coriander, curry leaves for vadai. Grind for biryani as in the recipe. (I made a no grind version).
  4. First temper for curd semiya. Then prepare biryani. Simmer the biryani and let it get cooked.
  5. Cook semiya for curd semiya and keep aside for cooling.
  6. Grind for masala vadai and mix everything and keep aside.
  7. Biryani would have been done by this time and mix, prepare curd semiya as well.
  8. Prepare raita and lastly fry some vadams and make masala vadais hot.
Enjoy with your family – Semiya biryani, curd semiya, masala vadai, raita, pickle and vadams.


semiya biryani, curd semiya, masala vada

Check out the recipes
  1. Semiya biryani recipe
  2. Curd semiya recipe
  3. Masala vadai recipe
  4. Koozh vadam recipe
  5. Pickle recipes
You can add phulkaand amixed vegetable kurmato this menu to make it more elaborate. You can try semiya payasamor semiya kesari too for dessert.
Have a great weekendHappy

Baby corn pepper fry recipe (Stir fry)

$
0
0
baby corn-recipes     
I cook baby corn weekly once atleast as it is one of the few vegetable that Aj eats. But Vj used to always complain he gets a different (medicine) smell in baby corns when ever I make something with baby corn. Recently I have started buying Organic vegetables that is available in Fairprice. They have very few choice, so I look for and buy possible vegetables like ladies finger, radish, beans, cabbage, cucumber and this baby corn. Carrots rarely will be good, so pick that too. You would have seen these cute carrots in my carrot orange juice. But now a days, not so good looking carrots is there in the organic section, so I go for the usual Australian carrots.  But Vj always now a days insists to buy these organic baby corns as he finds it perfect. He complains no odd smell in it. Even I realize that. I make baby corn bajji for Aj or this stir fry these days.
baby-corn-pepper-stir-fry

Baby corn pepper fry recipe

Recipe Cuisine:Indian  |  Recipe Category:Breakfast
Prep Time: 10 mins    |  Cook time: 20 mins    Serves: 2

Ingredients

Baby corn 10 
Onion 1 
Garlic  3 flakes 
Red chilli powder or sambar powder (Optional) 3/4 tsp 
Black pepper powder 1 tsp 
Tomato ketchup or sauce 1 tsp 
Salt  As needed 


To temper

Oil2 tsp
Mustard3/4 tsp
Jeera1 tsp
Curry leaves1 sprig


Method

  1. Clean and cut baby corn into thin rounds. You can cut as long thin strips too, but I always cut into thin circles. Pressure cook it with little water and salt for 2 whistles. In a pan, heat oil and temper with the items given under ‘To temper’ table, followed by crushed garlic (with skin is fine).
  2. 1-cook
  3. Fry onion till transparent. Add cooked baby corn, salt, ketchup, chilli powder, pepper powder.
  4. 2-add
  5. Mix and stir in medium flame for 3 minutes. Drizzle little oil if needed. 
  6. 3-fry

Notes

    • Adding half chilli powder and half pepper powder adds spiciness and flavor to the stir fry. So I recommend using chilli or sambar powder too for best results.

Serve as accompaniment for any rice – We had with Fried rice.

baby corn-pepper-fry-recipe

Soya chunks biryani | Soya chunks recipes | Meal maker biryani

$
0
0
soya-chunks-biryani-recipe 
Inspite the numerous health benefits, my family does not like to eat soya chunks. Aj is fine with soya chunks curry. I am a great fan of soya chunks in kurmas. But other than us, no one likes it. Also they  will ask me weirdly that I am cooking and eating soya chunksOh go on. I too rarely cook but as Vj doesnt eat. So after a short break, I bought this Manna soya chunks pack in Mustafa. Unlike the small soya chunks I buy regularly, this was the medium sized which I am handling for the first time. But after making this biryani, the result was perfect, so I am sure I will use this pack effectively. And this Biryani recipe, though I wanted to follow a supplementary book’s recipe, I ended up making biryani in a way that I learnt from a friend (sukku kuzhambu, vada curry andpattani kuzhambu fame). She uses this recipe to make vegetable biryani. It will be awesome. But I adapted that too for my convenience. And it turned out really good and perfect.
meal-maker-biryani-recipe

Soya chunks biryani recipe

Recipe Cuisine:Indian |  Recipe Category:Breakfast
Prep Time: 35 mins    |  Cook time: 25 mins    Serves: 2

Ingredients


Basmati rice 1 cup 
Soya chunks  30 
Onion 1 
Tomato, small 1 
Curd 3 tblsp 
Turmeric powder 1/4 tsp 
Red chilli powder 1 & 1/2 tsp 
Green chillies  3 
Mint leaves 15 
Coriander leaves, chopped 3 tblsp 
Ginger garlic paste 1 & 1/2 tsp 
Ghee 1 tsp 
Salt  As needed 

To temper

Ghee or oil3 tblsp
Cinnamon1 inch piece
Bay leaf1
Cloves1
Cardamom1
Jeera/ cumin seeds1 tsp


Method

  1. Soak basmati rice in warm water for 30 mins atleast. I used medium sized soya chunks (it may look different in size because of camera lens).
  2. 1-soak
  3. Boil water with 1/4 tsp salt and add the soya chunks. Cook in medium flame for 10 minutes. 2-boil
  4. Rise with cold water and squeeze it till dry and again repeat it. Keep aside.
  5. 3-rinse
  6. I cut each chunk to two, its optional. Keep all the other ingredients cut ready. Then after the rice is soaked for 30 mins, boil 5 cups water and add rice to it.
  7. 4-cut
  8. Let it boil for 5 minutes or until its 90% done. Add few mint leaves torn to this, add little salt and a tsp of ghee.
  9. 5-cook
  10. Toss and keep aside. Heat a small pressure cooker with ghee. Temper with items given under ‘To temper’ table in order.
  11. 6-mix
  12. Add sliced onion, fry till transparent. Add soya chunks, ginger garlic paste and fry until dry for 2 minutes in medium flame.
  13. 7-fry
  14. Add tomato, salt, red chilli powder, green chilli and turmeric. Fry until tomatoes become soft.
  15. 8-tomato
  16. Add curd, remaining mint leaves and fry for 2 more minutes.
  17. 9-curd
  18. When it becomes thick, add 1/4 cup water and bring to boil.
  19. 10-gravy
  20. Add the cooked rice and mix evenly. Flatten with back of ladle and cover with cooker lid (I do with the pressure valve). I can keep the flame really low in my stove burner, so how much ever its is possible keep the flame low and cook for 12 minutes. You can keep over a dosa pan too if you cant put flame in low.
  21. 11-rice
  22. After 12 mins, let it stand as it is for 5 minutes and open the cooker, add chopped coriander leaves and mix gently.
  23. 12-cook

Notes

    • Soaking rice in warm water helps in rice getting cooked fast and also gives long grains.
    • I used India gate aged rice.
    • Adding ghee, salt and mint leaves immediately after draining the rice adds a lots of flavor. So do not skip it.
    • Do not cook the rice too much time before making the biryani. Make sure to use the rice as soon as it is cooked. If you keep the boiled rice for long time, it will become dry and be like uncooked rice.
    • Do not over mix as it will break the rice grains.
    • Washing and squeezing the cooked soya chunks completely, ensures to get rid of the smell.
    • You can add vegetables along this too.

Serve hot with onion raita the best or even you can add a vegetable kurma as side dish.

Check out the other soya recipes : Soya chunks curry recipe  | Soya kheema toast recipe  | Soya kheema paratha  | Soya bean dry curry

soya-chunks-biryani

Senai kizhangu curry | Elephant yam Recipes

$
0
0
senai-kizhangu-curry-recipe     
I never realized that I loved this senai kizhangu curry when they used to serve in our lunch at our hostel mess (SRC, Trichy). But after I finished my studies, when ever I used to remember this curry I started to crave for this. But We never made it this way in our home. We make senai  kizhangu in dosai kal (Elephant yam roast recipe) otherwise a curry similar to that and mami makes this senai kizhangu chips every time. So I always wanted to try this at home. Since vj is not a big fan of this, I never buy elephant yam. This time, I really wanted to try this, so bought and made this curry. It was different from what I used to eat at my hostel, as I made it in my way. I loved the lunch with this curry and will make it often here after when ever I get a chance.
elephant-yam-recipes


Senai kizhangu curry recipe

Recipe Cuisine:Indian  |  Recipe Category:Lunch - side dish
Prep Time: 30 soaking    |  Cook time: 20 mins    Serves: 4

Ingredients


Senai kizhangu, chopped 1 & 1/2 cups 
Sambar powder 1 & 1/2 tsp
Fennel seeds powder 1/2 tsp
Turmeric powder 1/4 tsp
Tamarind  1 tsp tightly packed
Salt As needed

To temper

Oil2 tblsp
Mustard3/4 tsp
Urad dal2 tsp
Curry leaves1 sprig


Method

  1. Soak tamarind in hot water for 30 minutes and extract juice. Peel off the skin of the yam and chop it finely as shown in the picture.
  2. 1-cut
  3. Wash it with water and boil with salt, turmeric and tamarind water. Cook until done.
  4. 2-cook
  5. Drain and keep aside. Heat a pan with oil and temper with the items given under ‘To temper’ table, in order.
  6. 3-temper
  7. Add cooked yam, sambar powder, fennel powder and sprinkle little water. Mix well. Fry for 2 minutes and drizzle over some oil while turning. When the masala powders wafts aroma, transfer to the serving bowl.
  8. 4-fry

Notes

    • Buy elephant yam and let it sit in shelf for few days to avoid too itchy yam. As it gets older, less its itchy property.
    • While chopping, you can smear your hands with oil or lemon juice to avoid itchy feeling.
    • Cooking in tamarind water is must to avoid itchiness.
    • You can temper with fennel and avoid the powder.
    • Instead of sambar powder, you can replace it with red chilli powder 1 tsp and coriander seeds powder 1/2 tsp.
    • If you dont like fennel smell, avoid it and add a pinch of asafoetida powder while tempering.

Serve as accompaniment for rice. Goes well with anysambar and rice.

senai-kizhangu-curry

Breakfast menu 11 - Vada curry, dosa, mint chutney, coffee

$
0
0
Dosa, vada curry, mint chutney

Before I went to Chennai this time, for a while I made list of places where I should go, what I should buy, what I should eat etc… Yes, when ever I go to India, many things will be in my mind that flashes now and then but will forget everything when I go there. So I make a list. The shops I should go and buy cloths, the restaurant I should go and eat, the places I should go and see… Though I make a big list, I will be able to do only few things. Still no regrets, there is always the next timeRaised Eyebrow. So this time, eating vada curry is one such thing in my to try list in restaurant.
So once when we went to Anna nagar for shopping, we went to Saravana bhavan and I ordered this set dosa with the choice of vada curry. And this is the first time I am eating vada curry in a restaurant. It was very mild looking and tasting similar to mixed veg kurma. I could not see any vada in that, everything looked mashed up. I don’t know if that’s how its supposed to be, still loved it. It was completely different from what I posted here as vada curry recipe. When I posted that recipe itself, two readers (Vilasini & Viji) had left their recipes, asking me to try and both were very authentic. I loved that concept of steaming too as its less fat. I guessed that would come out similar to what I tasted in saravana bhavan. So I tried it that way this time and surprisingly I could totally relate to the vada curry I ate and it was delicious. And I will post this separately as a new post sure tomorrow or Tuesday. Now on to how I prepared this breakfast menu.

Dosa, vada curry, mint chutney - breakfast menu 11

Recipe Cuisine:Indian  |  Recipe Category:Breakfast
Prep Time: 12 hr     |  Cook time:1 hr    Serves: 4

  1. You have to soak and grind for idli/ dosa batter the before day itself and keep the batter ready for next day. The next day, on wake up, soak channa dal for vada curry (mininum 3 hrs).
  2. After 3 hours, grind and steam for vada curry. While its steaming do the chopping works. Onion and tomato for vada curry and mint chutney. Clean mint leaves for mint chutney.
  3. Keep all the ingredients like coriander, curry and mint leaves for garnishing, ready. Once the steamed vadas are ready, mash it and keep it ready as well.
  4. Heat kadai, roast for mint chutney, temper for mint chutney, saute for mint chutney. Cool it as side.
  5. Next prepare vada curry and let it be simmered in a stove. Meanwhile which you can grind mint chutney.
  6. Once vada curry is ready, when ever your family is ready for breakfast make dosa hot. Remember, for vada curry, soft thick dosas are perfect match.
Breakfast with vada curry, dosa and chutney. I added up a filter coffee to make it more appealing, but its optional to serve along breakfast.

south indian breakfast menu ideas

Check out the recipes
  1. Idli dosa batter
  2. Vada curry recipe ( Will post this version next)
  3. Mint chutney with onion tomato
  4. Filter coffee recipe.
I didn’t had coconut, if I had I would have madecoconut chutney to go with this. Check out the other chutney recipes too.

Badam kheer recipe | Almond dessert | Indian dessert recipes

$
0
0
badam-kheer-recipe
I know my readers have been expecting this recipe for a long time now. Really long time, for years. I wanted to post it for long time too, as my readers Google and search as “ Badam kheer Raks kitchen”. Still it took this much long for me to post this, I am really sorry. But now I got a chance to try this dessert for a friend who came here for a short stay. I also wanted to picture this in the new serving bowl set I got from Currim boysBig Grin.  I am making this for only may be second time in my life, so curelessly I made with 1/2 cup of badam and got a lot of kheer that I kept in the fridge and had for few days Rolling Eyes. So I have halved the recipe here to keep it simple.  And this post is on time for Ramzan, and I wish all the reader friends who ever celebrating a Happy Ramzan Party
I will post the vada curry recipe, next, I promise Batting Eyelashes.
badam-kheer-rakskitchen

Badam Kheer recipe

Recipe Cuisine:Indian  |  Recipe Category:Dessert
Prep Time: 15 mins    |  Cook time: 25 mins    Serves: 4

Ingredients


Badam / Almonds 1/4 cup 
Milk  2 & 1/2  cups 
Saffron A pinch 
Cardamom 1 
Sugar  1/4 cup 
Ghee 2 tslp 

Method

  1. Bowl milk and soak the saffron separately in lukewarm milk. Keep boiling the milk in low flame.
  2. 4-boil
  3. Boil water and add almonds to it. Let it boil for a minute. Switch off the stove, drain and wash under tap water to cool down.
  4. 1-blanch
  5. Now you will be able to peel off the skin. Peel all the almonds.
  6. 2-peel
  7. Reserve some 6 almonds for garnish. Grind rest of the almonds with little milk to a smooth paste.
  8. 3-paste
  9. Add the ground almond paste, soaked saffron and sugar and mix well.Bowl until you get the desired consistency. Keep stirring every now and then, to avoid burnt bottom. It could take around 8 to 10 minutes in medium flame.
  10. 5-boil
  11. Slice the reserved almonds into thin strips. Heat ghee in a pan and fry the almonds for a minute and add it to the boiling kheer. Switch off the flame.
  12. 6-fry

Notes

    • Adjust sugar as per your need.
    • The consistency can be adjusted as per your wish. If you want more thicker side, use less milk.If you want it like badam milk, you can use less badam.
    • Be generous in adding elachi and saffron as it lends a nice flavor to this kheer. Otherwise the smell of almonds may be dominating.
    • Tastes best when served chilled, preferable the next day.
    • If you want to make badam milk, add a small piece of cinnamon, 1 clove and a mustard size edible camphor to the boiling milk and reduce the badam to half.

Serve chilled as it taste best when served chilled. I love this badam kheer especially with the badam garnish which adds a nice touch this here and there.
badam-kheer

Vada curry recipe - Steamed version

$
0
0
vada curry steamed
As I posted last in the breakfast menu11, here I am  with the vada curry recipe . This is perfect for dosa for me, loved it a lot with soft spongy dosa. Some suggest this for appam, poori or chapati too. I tried with chapati, it was good. Yet to try with poori and appam. I can eat vada curry as such even though its a side dish. It gives so much volume, so its perfect when you have get-togethers  or have guest at home. You follow the same recipe and make with left over masala vadais too. Again thanks to Vilasini & Viji for the recipes.
vada-curry recipe


Steamed vada curry recipe

Recipe Cuisine:Indian  |  Recipe Category:Side dish
Prep Time: 3 hrs soaking time    |  Cook time: 30 mins    Serves: 6

Ingredients


Channa dal  1/2 cup 
Red chilli   4 
Fennel / Spambu/ Saunf   1 tsp 
Onion   2 
Tomato  3 
Ginger garlic paste  1 tsp 
Red chilli powder  1 & 1/2 tsp 
Coriander seeds powder  1 tsp 
Turmeric  1/8 tsp 
Salt   as needed 
Mint leaves  10 
Coriander leaves, chopped  2 tblsp 
Curry leaves   1 sprig 


To temper

Oil2 tblsp
Cinnamin1 inch piece
Cardamom1
Cloves1
Bay leaf1
Jeera/ cumin seeds (optional)1 tsp


Method

  1. Soak channa dal for 3 hrs. First grind chilli, fennel and salt.
  2. 1-soak
  3. Then add the drained channa and grind coarsely. Do in batches to ensure even grinding. Do not grind smoothly.
  4. 2-grind
  5. Grease idli plates and fill the moulds with the ground mixture, make a dent at the middle to ensure easy cooking. Steam cook for 8 minutes.
  6. 3-steam
  7. Once cooled, break it roughly. I forgot to add curry leaves before steaming, so added after breaking. Heat a pan with oil and temper with the items given under ‘To temper’ table in order.
  8. 4-temper
  9. Add finely chopped onion and fry till transparent. Add ginger garlic paste and fry for a minute in medium flame. Add finely chopped tomatoes and all the powders – red chilli powder, dhaniya powder (coriander powder) and turmeric powder. Add required salt for the gravy.
  10. 5-masala
  11. Fry for a minute or until the masala blends and becomes mushy. Add 3 cups water. 6-masala-cook

  12. Bring to boil and add the crumbled dal and simmer for 10 minutes.
  13. 7-boil
  14. Once the oil floats on top and the gravy becomes thicker, garnish with chopped coriander and mint leaves.
  15. 8-garnish

Notes

    • Add enough water as it requires lots of water.
    • Min leaves adds very nice flavor to the gravy.
    • If using masala vada, use 8 vadais.
    • You can add 2 slit green chillies if you want extra hot gravy.

Serve hot with hot set dosa  - the dosa you see below is nothing but soft thick dosas, made from idli dosa batter.vada-curry-recipe 

Kuthiraivali upma | Barnyard millet upma | Millet recipes

$
0
0
kuthiraivali-upma   
Barnyard millet upma recipe (Kuthiraivali in Tamil / Jhangora in Hindi / Odalu in Telugu / Oodalu in Kannada) was the first millet recipe I tried in my kitchen. But posted thinai paniyaram first. This upma is very easy and basic to cook, can start with this if you are new to millets. Need not worry that cooking millet is complicated. Its really easy and not tricky at all. This tastes similar to arisi upma. You can make it same way as no onion and without vegetables too. But I added veggies. Even bachelors can try this. This is a healthier option for rice upma coz of its nutritional values -  improve  metabolism of our body. Good for diabetics too. It is rich in calcium, phosphorous, iron and rich in fibre content. When cooked, it gives a lot of volume. Keeps you feel full for long time too.
kuthiraivali barnyard  millet recipes

Kuthiraivali (Barnyard millet) upma  recipe

Recipe Cuisine:Indian  |  Recipe Category:Breakfast
Prep Time: 5 mins    |  Cook time: 20 mins    Serves: 2

Ingredients


Barnyard millet 1/2 cup 
Water 1 & 1/2 cups 
Onion 1 
carrot, finely chopped 2 tblsp 
Beans, finely chopped 4 
Ginger, very finely chopped 1 tsp 
Green chilli 2 
Salt As needed 


To temper

Coconut oil/ or any cooking oil1 tblsp
Mustard3/4 tsp
Urad dal1 tsp
Channa dal1 tblsp
Curry leaves 1 sprig


Method

  1. Wash the millet once or twice and drain water completely.
  2. 1-wash
  3. Heat a kadai with oil, temper with the items given under ‘To temper’ table in order. Followed by onion, green chilli and ginger. Fry till onion turns transparent. Add veggies and fry for 2 minutes in low flame.
  4. 2-temper
  5. Add water and salt. Bring to boil and add the millet. Mix well.
  6. 3-boil
  7. Cook covered in low flame for 8 to 10 minutes or until all water dries up.
  8. 4-cooked

Notes

    • Can be garnished with grated coconut.
    • Coconut oil and ginger adds nice flavor.
    • If making without onion and veggies, add asafoetida while tempering and add pepper powder for flavor.

Serve hot with any spicy coconut chutney or even sugar. I had with peanut chutney.
kuthiraivali-upma-recipe

Lunch menu 42 - Vadai payasam sappadu

$
0
0
south indian lunch recipes

Today is aadi perukku / aadi 18 and like I made this aadi perukku lunch menu last year, this year too, being a Sunday, I made special lunch and offered God. But unfortunately Vj had to go for work today, so I finished cooking soon and he had directly lunch and left to office. This lunch menu is similar to the full meals I had already posted, so I am not elaborating on how I prepared this menu. Just I am linking the recipes. Though I made sambar, rasam, curry, kootu, I offered God only the items that had no onions in it. Apart from this lunch offering, we pray early in the morning too, with raw rice soaked with jaggery and tie yellow thread too around neck.

aadi perukku customs

And here is how my mom, performs her pooja at the motta maadi (Terrace) in our home at Salem, assuming as the holy river bank Cauveri . She brings manal (river sand) and makes a square out of it and keeps manjal pillayar ( Ganesh made out of turmeric powder) and offers the fruits, rice soaked and mixed with jaggery, a black glass bangle coupled with pink tainted dried palm leaf strip, a new saree with blouse bit, some jewels, mirror, flowers, etc..along with the holy yellow thread above.
Pic courtesy : My Dad :)


Check out the links below. Our lunch had the following items
  1. Paruppu (Dal in south Indian style)
  2. Carrot thayir pachadi (Carrot raita)
  3. Potato curry recipe
  4. Cabbage kootu recipe
  5. Cluster beans sambar (Check similar broad beans sambar recipe)
  6. Rasam recipe
  7. Ulundhu vadai recipe
  8. Vendakkai varuval recipe (crispy ladies finger fries)
  9. Aval payasam recipe ( Poha payasam) - I made with sugar this time
  10. Appalam
  11. Curd
  12. Pickle recipes

Easy mooli paratha recipe (Radish paratha)

$
0
0
mooli-paratha
I already have a stuffed version ofmooli paratha. But this is an easier way of adding the grated radish while making the dough itself. Last year when we went to Bali for a weekend along with a friend’s family, I went just to take a break from cooking and all the usual daily chores, so didn’t bother to make something to carry for eating there. But the friend’s family brought mooli paratha with pickle. Their maid makes awesome parathas they said and I agree with them as the parathas were delicious. I asked them how she makes and wanted to try that for a long time. But never found a chance to make. 2 weeks back, I was not interested in having the usual menu for lunch so wanted to have some parathas. I had 2 organic radish sitting in the fridge. So I thought I will try mooli paratha and blog too. It was so so delicious and I enjoyed the lunch to the core, with pickle and curd.
mooli-paratha-recipe

Easy mooli paratha recipe

Recipe Cuisine:Indian  |  Recipe Category:Dinner/ Lunch
Prep Time: 5 mins    |  Cook time: 15 mins    Makes: 4

Ingredients


Grated radish  3/4 cup 
Wheat flour/ Atta 1 cup 
Red chilli powder 1 & 1/4 tsp 
Garam masala powder 1/2 tsp 
Turmeric powder 1/4 tsp 
Jeera/ cumin seeds 1 tsp 
Salt As needed 
Oil/ ghee  As needed 

Method

  1. Peel and grate the radish in a grater and mix little salt with it, keep aside for 10 mins.
  2. 1-radish
  3. You will be able to squeeze out a whole lot of water from this grated radish, do not discard this water, save it. Mix all the ingredients in a mixing bowl, use the squeezed out water to make dough instead of water.
  4. squeeze
  5. You may not need all the water as radish itself is moist, so carefully add water. Make equal sized balls out of it.
  6. 3-roll
  7. Roll out to thick parathas. Not too thick, just with 2 chapathi’s thickness. Dust generously with flour while rolling out.
  8. 4-roll
  9. Heat tawa and cook on both sides drizzling some oil or ghee each side, until golden brown spots appears.
  10. 5-cook

Notes

    • I used 2 radish for this, but depends on the size of the radish.
    • You can add green chillies too in the dough.
    • Important : Make parathas as soon as you prepare the dough. If you keep the dough for a while, it will leave water and becomes sticky and it will be difficult to roll.

Healthy and tasty parathas goes well with simply pickle and curd, you wont even know it has radish. I love it hot.
radish-paratha-recipe

Sweet pidi kozhukattai | Pidi kozhukattai sweet

$
0
0
sweet-pidi-kozhukattai
We make sweet pidi kozhukattai very often. Vj is a very big fan of this. It is easy to make when compared to the traditional kozhukattai and can be made in jiffy for evening snacks or even dinner. Mom makes this along with the easy salt kozhukattai version. I just go crazy eating without any counts. As I was not a big fan of jaggery/ sweet versions before, but mom will say I should finish both, I will sandwich both sweet and salt and eat Blushing. My MIL also makes, but sweet version alone. My MIL adds grated coconut, while mom adds coconut bits. I love both. We make this on special days like sangatahara chaturthi or any fridays like aadi velli or Chitra pournami too. But can be made as snack on regular days.
pidi-kozhukattai sweet     

Sweet pidi kozhukattai recipe

Recipe Cuisine:Indian  |  Recipe Category:Breakfast/ snack
Prep Time: 15 mins    |  Cook time: 30 mins    Makes: 16 mini kozhukattais

Ingredients

Rice flour (Idiyappam flour works best) 1/2 cup 
Jaggery, powdered 1/4 cup heaped 
Water 1 cup 
Cardamom  1 
Chopped coconut 2 tblsp 
Sesame oil 1 tsp 
Salt 1/4 tsp 

Method

  1. In a heavy bottom pan or non stick pan, add water and jaggery. When jaggery is completely dissolved, filter if any impurities are there. I skipped as mine was pure. Add powdered cardamom, coconut bits to it. Bring to boil.
  2. 1-jaggery
  3. Simmer the flame.Add flour and while you keep stirring. Don’t worry if it forms lumps, it will disappear as we mix. Everything will be turning quick, so make sure you are ready for that.
  4. 2-add
  5. Cool it and when it is still warm, grease your hands and make a smooth dough out of it. Divide into equal sized balls.
  6. 3-dough
  7. Keep each ball in your hand and press it to bring an oblong shaped dumplings. Arrange in the steamer.Idli plate works fine, but grease before you arrange.4-shape
  8. Steam cook for 10 to 12 minutes or until the kozhukattais turn shiny.
  9. 5-steamed

Notes

    • After the dough is ready, keep covered to avoid drying.
    • If  making large quantities, cover the shaped kozhukattais too.
    • Important: If using store bought rice flour that is coarse or home made rice flour, water quantity may vary.
    • Grease hands to avoid sticking.
    • The key is to cook the flour while boiling itself. This gives softest kozhukattais.
    • If you use more jaggery than mentioned and less water, it wont get steamed properly how much ever time you cook it.
    • Also do not let the jaggery for syrup stage as it will not let the flour cook and again it wont get cooked even after you steam for long time.

Hot or not, it will taste divinely! With coconut bits here and there, it adds nice texture to it.

pidi-kozhukattai-recipe

Sindhi curry, Aloo took - Lunch menu 43

$
0
0
sindhi curry aloo took
I wanted to make something totally different from my regular menu, so decided to make this sindhi curry and aloo tuk for lunch today. I know Aj loves aloo took as side dish. Coz, Vj and Aj ate this aloo took in Kailash parbhat. My friend Sangeeta has been insisting to put variety of north Indian lunch menu in this lunch menu series. But being a south Indian, I mostly cook our cuisine as Vj’s wish. When ever we get chance, Vj is not around, I try north Indian recipes for myself and Aj. I had this recipe of Sindhi curry (tomato kadhi) as a contribution recipe from Sangeeta but never tried or tasted. Only 3 years back, I had a chance to taste this kadhi when a friend threw party at Kailash parbhat. It was buffet and I felt myself comfortable tasting this. Coz definitely when we go for ale carte, I would never order as I know only I should eat all. And when I tasted this kadhi for first time, it was really good, I could relate the taste to a mix of several south indian vatha kuzhambu, sambar. Weird but yes. The methi flavor, tangy taste were like vathal kuzhambu and the flavor of mixture of veggies used – drumstic, radish, cluster beans, were like sambar. So from that time I wanted to try at home, but lazy me never did until todayRaised Eyebrow. I will share aloo took recipe next week, so hang on with this simple easy Sindhi lunch menu.

Sindhi curry aloo took -Lunch menu 43

Recipe Cuisine:Sindhi  |  Recipe Category:Lunch
Prep Time: 30 mins    |  Cook time: 45 mins    Serves: 3
  1. Pressure cook rice. Gather all the veggies needed. First cut radish and drumstick, let it cook in a stove.
  2. Mean while which you can chop other veggies, like ladies finger, cluster beans, chilli, ginger, curry leaves.
  3. Saute the veggies and temper kadhi, mean while you can puree tomatoes.
  4. Prepare kadhi and later prepare aloo took, except for the final frying part.
  5. When rice and kadhi ready, and your family is ready to have lunch, prepare aloo took and toast some papad, serve hot.
Really simple right? Batting Eyelashes  But very satisfying for me and complete change for me, so very interesting to cook as well.

tomato kadhi aloo tuk

Check out the Tomato kadhi recipe, I will post aloo took next week sure!
Happy weekend! Happy

Varagu Kanji recipe | Kodo millet porridge

$
0
0
kodo-millet-porridge
Kodo millet (Tamil: Varagu; Hindi: Kodra;  Telugu: Arikelu; Kannada: Harka) is one of the millets I got from India this time. I am just experimenting easy millets recipes for breakfast. I saw a recipe in a magazine, got an idea and I made this kanji just similar to vendhaya kanji we make with coconut milk. But here I have made it with low fat fresh milk instead coconut milk. Since garlic cooked in milk is good for health, with this healthy millet, this makes an excellent healthy breakfast. Kodo millet is a great substitute to rice. With lots of nutritional values, fibre, it keeps us full for longer time. And just a quarter cup makes a lot of kanji too in a jiffy. Why not try this for a day’s breakfast and stay healthy!
varagu-kodo-millet-recipes

Varagu Kanji recipe

Recipe Cuisine:Indian  |  Recipe Category:Breakfast
Prep Time: 10 mins    |  Cook time: 15 mins    Serves: 2

Ingredients


Varagu / foxtail millet 1/2 cup 
Milk 1 cup 
Water 1/2 cup 
Garlic  4 flakes 
Pepper powder 1/4 tsp 
Salt  As needed 
Curry leaves few 


Method

  1. Wash the millet once and in a small pressure cooker, add it with milk, water and peeled garlic.1-wash
  2. Pressure cook in medium flame for 4 whistles. Once done, mash it well.2-cook
  3. Add more water or milk and salt. Bring to boil and continue until you get the desired consistency. Keep stirring in between now and then. Add pepper lastly.3-boil

Notes

    • Adjust water and milk amount as per your need. But 1 cup milk is must.
    • You can add coriander leaves instead curry leaves too.
    • Instead of garlic, if you want it satvik, avoid it, cook with a pinch of hing/ asafoetida and later temper with mustard, green chilli and more hing.

I would like to have it as such. But if you want, you can have it with a dash of pickle or kara kuzhambu/ vathal kuzhambu.
varagu-kanji-recipe

Seepu seedai recipe | Krishna jayanthi recipes

$
0
0
seepu-seedai-recipe
I have only one time experience in making seepu seedai. I cannot say making, I have to say helping experienceTongue. That too when I was in my 6th standard or something like that. My mom has that wooden log meant for making this seedai with stripes in it. I had no clue what went into the dough or anything, just helped in making shapes. But I remember well that it tasted awesome!  We make it same as our magizhapoo thenkuzhal dough but shape different and give it a sweet twist too. I like that twist a lot actually. I know its not common to see that sweet version, who ever know about seepu seedai sure know it as only a savory snack. So I too made the salt version major, but sure did sweet too, how can I not make my favorite when I am putting so much effort! Its just the finishing step where we can make it sweet, so I made a small sweet batch too.  I have to disclaim you that this is not the authentic chettinad version of making, but our own way of making seepu seedai. Actually I made it today bit modified from the way mom does too.
This is a bit time consuming, so better have a helping hand and start making it. Do not make more than 2 cups, otherwise you will have a broken backLaughing.
seepu-seedai-seepu-murukku

Seepu seedai | Krishna jayanthi recipes

Recipe Cuisine:Indian  |  Recipe Category:Snacks
Prep Time: 45 mins    |  Cook time: 35 mins    Makes: 4 cups

Ingredients


Rice flour / Idiyappam flour 2 cups
Roasted, powdered urad dal flour 1/4 cup 
Roasted, powder moong dal flour 1/4 cup 
Coconut milk 1/4 cup approx. 
Salt  As needed 
Oil  For deep frying 
Powdered sugar(optional) As needed 


Method

  1. I used readymade rice flour (idiyappam flour) and urad dal flour, So if you want to make urad dal flour, roast it, cool and powder it as I have did for moong dal. If coarse, sieve it.
  2. 1-powder
  3. Grind 3/4 cup of coconut with little (little less than 1/4 cup) warm water and grind it smoothly. Extract coconut milk.
  4. 2-coconut-milk
  5. Place the flours, salt in a mixing bowl and add 2 tsp oil. Add 1/4 cup coconut milk to it and and mix well. Sprinkle water (may need more than a cup) and make to a smooth dough without any cracks. Also it should not be sticky.
  6. 3-dough
  7. Keep dough covered all the times. Take the flat plate with ridges for the  murukku press, fill it with dough and make strips in a clean kitchen towel or counter top.  If breaks, sprinkle more water and knead again to make it smooth. Draw the tapes all over.
  8. 4-tape
  9. Cut each tape into smaller strips, so that each strip can just cover your fore finger if you roll over it. Join the ends of the strips around your finger to make cylinders.
  10. 5-shape
  11. Repeat the same to finish the dough. Heat kadai with oil, when the oil is hot, drop the seedais and put the flame to medium. You can fry 15 to 20 depending on the size of kadai and oil you use. Cook with frequent turning to ensure even cooking. It will take long time to cook.
  12. 6-fry
  13. At one point, the bubble with cease and shhh… sound stops, so you can know its done. Drain to paper towel. Repeat to finish frying the seedais.
  14. 7-drain
  15. Optional : I made smaller strips and just made the cylinders narrower and fried. I tossed this with powdered sugar as soon as I drain from oil. This is sweet version of the seepu seedai.
  16. 8-sweet

Notes

    • If you use coarse rice flour, then the murukku breaks. So make sure using finest rice flour.
    • For even mixing, you can even sieve(sift) the flours before adding wet ingredients.
    • Do not add more coconut milk, urad flour or moong flour than mentioned, which may lead to hard murukku.
    • While rolling, donot overlay more as it will lead to uneven cooking.
    • Do not roll too big as it may not hold the circular shape.
    • You can mix coconut oil little in the deep frying oil for extra flavor!
    • Check the crispiness only after it cools down completely.

Store in an airtight box and enjoy it as tea time snack. The flavor and taste is best from the next day.
sweet-seepu-seedai

Mini cashew murukku recipe | Mundhiri murukku

$
0
0
mundhuri-murukku-recipe
I had this recipe from last year Diwali itself. My MIL told this recipe after seeing it in a cookery show. But could not post it. But this is the perfect time for posting these cute tiny murukkus for Janmashtami 2014. Kutti kutti murukku for kutti Krishnar. I have seen this Chinna chinna murukku in Sri krishna sweets. So this one is inspired from it. My MIL told to try as chinna chinna kai murukku, but I made it in murukku press itself. Kids would love this too as they are looking cute. I had fun making this murukku. Do try it for your family. It is easy, comes out light and crispy, golden in colour too, with simple ingredients at home!
easy-murukku-recipe

Mundhiri murukku recipe

Recipe Cuisine:Indian  |  Recipe Category:Snack
Prep Time: 15 mins    |  Cook time: 25 mins    Makes: 30 mini murukkus

Ingredients


Rice flour / idiyappam flour 1 cup 
Cashew nuts 15 
Asafoetida / hing/ Perungayam 1 generous pinch 
Sesame seeds 1 & 1/2 tsp 
Salt As needed 
Ghee/ melted butter 1 tsp (optional) 
Oil For deep frying 


Method

  1. Grind cashew nuts with little water, smoothly. There shouldn’t be any cashew bits seen.
  2. 1-grind
  3. Place the rice flour, salt, asafoetida, sesame seeds, ghee in a mixing bowl. Add the ground cashew to it. Add enough water little by little and make a smooth dough without any cracks. Should not be sticky either.
  4. 2-dough
  5. Take a single holed star or this colver shaped plate in the murukku press. Fill the press with dough.
  6. 3-press
  7. Press into small coils/ circles as shown in the picture. You can press in greased ladles (you may need a lot) or greased back of a plate, or even greased small flat plates.  Heat oil in a kadai and when hot, drop these tiny murukkus carefully into oil. You can slide each one slowly along the sides of the kadai.
  8. 4-fry
  9. Cook in medium flame. Turn the murukku in between and cook until bubble ceases and shh… sound stops.Drain in paper towels and repeat to finish the dough.
  10. 5-drain

Notes

    • My MIL even tried adding few badams reducing the cashews. 10 cashews and 5 soaked and peeled badam. It comes out good.
    • You can do the same with any plate in the press – star or the regular thenkuzhal press.

Store in air tight containers after it completely cools down. Enjoy!

cashew-murukku-recipe

Gokulashtami recipes | Krishna Jayanthi recipes

$
0
0

Gokulashtami 2014 recipes

Recipe Cuisine:Indian  |  Recipe Category:Festival recipes
Here is the collection of all Gokulashtami recipes for this year 2104 (17th Aug,Sunday). Click on each picture to get the recipe! Please refer this page to see how to prepare homemade rice flour for these snacks if you wish to prepare form scratch. Wishing you all a Happy Gokulashtami :) Even if you cannot spare time making complicated recipes, you can still make your celebration by offering Krishna's favorite aval/ rice flakes and butter to him! Or you can even quickly whip up the instant wheat flour appam below, which takes hardly 5 minutes to prepare and 20 minutes of cooking time.

Maida seedai  Uppu seedai  Vella seedai nei-appam-recipe  Wheat flour banana appam  Kai murukku with video  thattai-recipe  Mullu murukku  Ribbon pakoda  Thenkuzhal  Aval ladoo  paal payasam
aval payasam   paal kozhukattai  paal kesari
mini murukku  seepu seedai


Microwave Therattipal recipe | Easy theratti pal recipe

$
0
0
microwave therattipal with condensed milk Wishing you all a Happy Gokulashtami / JanmashtamiHappy. After making seepu seedai and mundhiri murukku this year, I also wanted to make something simple and easy sweet so that even beginners can try and offer Baby Krishna. Bachelors, or even kids under elder’s supervision can do this within 10 mins. Yes! I think many bloggers have posted this, but I am very late to post this coz, I have made it only 2 or 3 times that too without ghee or curd, I simply microwaved and ended up in chewy milk candy! This year, even I got few requests to post this micorwave therattipal, when I started my Gokulashtami special recipes. This time I referred this blog since I got attracted by the title under 5 minutes. And also after these many years of cooking, I realized we need curd and ghee for that grainy texture to get a perfect therattipal using microwave. I am sure this will help many of you even till now you haven’t planned or made anything for the festival. Today my Late Grand mom’s star birthday as well, so dedicating this post to her. microwave-therattipal-recipe

Microwave therattipal recipe

Recipe Cuisine:Indian  |  Recipe Category:Dessert
Prep Time: 5 mins    |  Cook time: 8 mins    Serves: 4

Ingredients


Milk maid 1 tin 
Curd/ plain yogurt  2 tblsp 
Ghee  2 tsp 

Method

  1. In a large microwave glass bowl, place all the ingredients. Mix well.
  2. 1-mix
  3. Micorwave in high for 3 minutes. It will rise, so you need a really large bowl.
  4. 2-microwave
  5. Stir again and microwave for another 2 minutes. Stir well. I didn’t get the desired consistency, so I stirred well and again microwaved for 2 more minutes, stirring in between once. It should look like this – with the sides dried up and bubbles in the middle as well.
  6. 3-after
  7. If you slightly mix, there will be grainy texture. Give 4-5 minutes standing time and then stir to get grainy texture.
  8. 4-ready

Notes

    • Use microwave-able glass bowl, NOT plastic microwave ‘safe’ bowl.
    • Since it raises a lot almost double while boiling, you need a large bowl otherwise it will overflow and become mess.
    • I added 2 tsp of ghee only, but 1 tblsp is used in the source recipe. You can replace ghee with butter at room temperature too.
    • If you want you can add cardamom powder, but I think authentically nothing is added to it.
Quick and easy dessert is ready to offer God as well as to treat your family, with just 3 ingredients and  under 10 mins of timeBatting Eyelashes.
easy-therattipal

Malai kofta recipe | Malai kofta gravy

$
0
0
malai-kofta-curry
I have had malai kofta only once in my life time. Could you believe? Yeah. This is the second time but I made it myself. First time I had in a restaurant, it was a stuffed version, with cheese or dry fruits I do not remember. I had no idea trying this at home as well. But I saw a cute serving dish at Mustafa the one you see below in which I have kept the koftas. I everytime looks at it as its really cute and I wanted to buy it. And finally once got it too and thought I should post malai kofta in thisBlushing. Silly right, but somehow I tried malai kofta as well. This is a no onion no garlic version. But comes out really tasty. Its similar to the cauliflower kofta curry I had posted before. You can eat the koftas as such too or float it in this rich gravy.
malai-kofta

Malai kofta recipe

Recipe Cuisine:Indian  |  Recipe Category:Side dish
Prep Time: 20 mins    |  Cook time: 35 mins    Serves: 4

Ingredients For Kofta


Paneer,grated 1 Cup 
Potatoes 4 
Bread crumbs 3 tblsp 
Garam masala 1/4 tsp 
Chat masala 1/4 tsp 
Pepper powder 1/4 tsp 
Salt  As needed 
Chopped coriander leaves 2 tbslp 
Oil For deep frying 

Ingredients For Gravy

Tomato puree 1 cup, from 3-4 tomatoes
Oil/Ghee1 tblsp
Jeera/Cumin seed1 tsp
Cinnamon1 small piece
Cardamom1
Clove1
Ginger chopped2 tsp
Garam masala Powder1/2 tsp
Red chilli powder1 tsp
Coriander powder1 & 1/2 tsp
Turmeric powder1/8 tsp
SaltAs needed
Coriander leaves,chopped2 tbslp
Milk1/2 cup
Cream1/2 cup


Method

  1. Pressure cook potato for 3 whistle with little water. Drain, cool, peel and mash it.1-mash
  2. Boil water and immerse paneer cubes in it until its soft. Drain, cool and crumble it. 2-paneer
  3. I did it in my mixer by running it once. You can do with your hands as well. If using block paneer, thaw it and grate it in a fine grater. Mix all the ingredients  needed for kofta in the ingredients table.3-mix
  4. Form it to a dough. Make small equal sized balls out of it.4-roll
  5. Arrange everything in a plate and heat oil meanwhile. Deep fry in oil in medium flame in batches.5-fry
  6. Cook until golden in colour. Turn occasionally in between to ensure even browning and cooking. Drain in a paper towel.6-drain
  7. For gravy, I ground 3 large tomatoes to get 1 cup puree. Depending on the size of the tomatoes adjust the number of tomatoes using.7-grind
  8. Heat a pan with oil and temper with the whole garam masala followed by jeera. Add chopped ginger and just give it a fry. Add the pureed tomato.8-add
  9. Add the garam masala powder, red chilli powder, turmeric and coriander powder. Mix and cook covered in medium flame with a lid as it will splutter a lot.9-masala
  10. Mix in between to avoid burning. Once water evaporates, you can continue cooking without lid. Add more oil if need and fry.Once oil oozes out and masala becomes thick, add milk little by little and mix in low flame.10-fry
  11. Do not add all at once, keep stirring and add little by little. Lastly add cream also same way little by little. Never let the gravy boil on high flame at any point as it would lead to curdling.11-cream
  12. Lastly add coriander leaves and koftas. Do not mix. Let it be as such.12-garnish

Notes

    • Do not over cook potatoes as it will retain water and koftas will be too soft to handle.
    • If you do not have bread crumbs, you can use fresh bread slices crumbled in a mixer too.
    • If no bread crumbs or bread is available, add 1 tblsp maida or corn flour as binding agent.
    • Add koftas a little while before serving.
    • Do not let the gravy boil in high flame after adding milk and cream as it will lead to curdling of the gravy. Also do not add all at once, add little by little stirring.
    • You can add kasuri methi while frying the puree for extra flavor.

Serve with hot phulkas, best! Goes well with any mild pulaos too likejeera pualo.

malai-kofta-gravy
Viewing all 1220 articles
Browse latest View live