Quantcast
Channel: Rak's Kitchen
Viewing all 1220 articles
Browse latest View live

POTATO PODIMAS RECIPE

$
0
0
potato-podimas-recipe
I have made potato podimas only very few times as no one here likes it. But I love that name, it fascinates me every time when ever I hear ‘Podimas’Love Struck. Since I have not made this that much often, I don’t know too, how to make this. When I made last time too, it didn’t turn out good. The taste was not as my mom and MIL makes. I had no idea why. I think I mashed up the potatoes too much. So it wasn’t good. This goes well with any south Indian lunch menus. Kara kuzhambu, vathal kuzhambu, or arachuvitta sambar will go well with this potato podimas. Today when I was talking to my MIL, I asked her how to make and made it for lunch. Try this Indian way of mashed potatoesWinking.
potato-podimas

Potato Podimas recipe

Recipe Cuisine:Indian  |  Recipe Category:Lunch
Prep Time: 5 mins    |  Cook time: 20 mins    Serves: 4

Ingredients


Potatoes, large 2 
Onion 1 
Green chilli 3 
Grated coconut 1/4 cup 
Coconut oil 1 tsp 


To temper

Oil2 tsp
Mustard3/4 tsp
Urad dal2 tsp
Curry leaves 1 sprig


Method

  1. Chop onion finely, chop green chilli into circles. Pressure cook halved potatoes for 3 whistles. Peel the skin and make it a crumble. Do not mash.Heat a kadai with oil and temper with the items given under ‘To temper’ table. Add onion and green chilli, fry till onion turns transparent without changing its colour. Add more oil if needed.
  2. 1-potato-podimas
  3. Add salt and give a quick stir, add the potato crumble.
  4. 2-potato-podimas
  5. Add grated coconut and give a stir to mix well. Drizzle little coconut oil if desired. 
  6. 3-potato-podimas

Notes

  • Do not mash the potatoes, just crumble it roughly.
  • You can add a tsp of lemon juice too, but we generally don’t do that.
  • Coconut oil enhances the flavor.
  • You can also add turmeric along with salt to make it yellow.

We had it for lunch with radish sambar and hot rice. Mild and flavorful!

urulaikizhangu-podimas


COCONUT CHUTNEY | COCONUT CHUTNEY RECIPE

$
0
0
coconut chuteny recipe
‘Coconut chutney’ is a very easy and common side dish made in South Indian households. Though mainly for idli and dosa, its also best for pongal, vadai, upma etc. I have been thinking how to post this basic and simple recipe here. But many of the readers who are beginners/ new to cooking ask me how to make coconut chutney. So I think its high time to post this one here. I think the recipe is so simple and easy that can be made in a jiffy, there are lots and lots of variations that can be done with this basic recipe. So the notes will be longer than the recipe. Tongue 
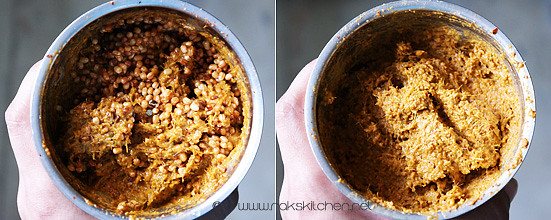
Also few tips and tricks for making perfect tasty chutney.
thengai-chutney-recipe

Coconut chutney recipe

Recipe Cuisine:Indian  |  Recipe Category:Side dish
Prep Time: 10 mins    |  Cook time: 2 mins    Serves: 3

Ingredients


Grated coconut 1/2 cup 
Fried gram dal (pottukadalai) 2 tblsp 
Green chillies 2 
Salt & Water  As needed 

To temper

Oil1 tsp
Mustard3/4 tsp
Urad dal1 tsp
Curry leaves1 sprig


Method

  1. Grate coconut, place it along with chilli, fried gram dal, salt and little water in a blender to grind it until smooth or desired consistency.1-how-to-make-chutney

Notes

  • Always use freshly broken and scrapped coconut for best tasting chutney. Dont use dried up coconut.
  • If the coconut is little bit on the tender side, then it will taste great.
  • How to troubleshoot  a watery chutney? – Add more grated coconut or little more fried gram dal and grind it again. Adjust salt and chilli accordingly.
  • My chutney is not white, why? – Do not scrap the coconut with the brown part, scrap carefully only the white part. Do not add more fried gram dal or chilli, which will also affect the colour.
  • Fresh and a bit tender coconut gives whitish chutney.
  • Add little milk for getting a rich and whiter chutney.
  • Add water carefully while grinding, you can add less while grinding and always can add more if needed later.
  • If you want chutney in runny side, add little more fried gram dal and grind it watery. If you want thick, then no need.
  • I sometimes never add fried gram dal also and grind with very less milk or water to make ‘getti chutney’.
  • Add a few drops of coconut oil and mix after grinding for a nice flavor or you can use coconut oil for tempering too.
  • Variations with this chutney : 
    * Add a small pinch of tamarind (Add more chilli to balance)
    *Add a garlic flake while grinding
    *Add a piece of ginger while grinding
    *Add a small onion (Shallots) while grinding
    *Add few curry leaves while grinding
    *Add a half sauteed tomato while grinding (Add more chilli to balance)
    *Add half sauteed onion while grinding
    *Add roasted channa dal in place of fried gram dal
    *Add roasted channa dal and red chillies in place of fried gram dal and green chillies.
    *Add roasted peanuts and red chillies in place of fried gram dal and red chillies.
    *Temper 2 tblsp finely chopped small onions
    *Fry some carrot and grind along to make carrot chutney
  • Do not use your hands while grinding if you are packing it and makes sure you temper the chutney as my mom / MIL says it keeps the chutney longer without getting spoilt.

That’s it, you can pair it up with Idli, Dosa, Pongal, kichadi,upma, adai, vadai, rava dosa etc.

coconut-chutney-recipe

VAANGI BHAAT, LEMON RICE, CURD RICE - LUNCH MENU 39

$
0
0
Vaangi bhaat lemon rice curd rice


I had only very few brinjals leftover after I made the brinjal curry (with garlic) last week and I was really bored of my usual cooking – sambar– poriyal, etc; etc;Doh. And I ran out of the regular eating rice too. I was thinking what to make and suddenly thought of making vaangi bhaat. I didnt want to waste those brinjals or make sambar with it. And was worried if Vj would eat or not. So I added on the lemon rice to the menu. I had very little regular eating rice, so made curd rice with it. But to my surprise, Vj loved the brinjal rice more than lemon rice, coz it turned out super delicious and spicy. Needless to say, I love, loved the whole meals. I always love variety rice over the regular sambar sadam. Its easy to cook and break from the routine cooking too. Let me write how I prepared this lunch menu.

Lunch menu 39 – Vaangi bhaat, Lemon Rice, Curd rice

Recipe Cuisine:Indian  |  Recipe Category:Lunch
Prep Time: 30 mins     |  Cook time: 1 Hr    Serves: 3
  1. I used India gate aged rice. It gives longest grain and flavorful too. I soaked it for an hour in warm water. Cooked it in electric rice cooker.
  2. Pressure cook the regular rice for curd rice, cool down that as well. I used half the basmati rice for vaangi bath and half for lemon rice.
  3. Grate coconut. Keep all the ingredients required for everything, like curry leaves, coriander leaves, green chillies, cut brinjal and keep immersed in water.
  4. Roast for vaangi bhaat. Cool down.
  5. Temper for curd rice, transfer to a container in which you are going to mix it. Temper for lemon rice and transfer to another bowl in which you are going to mix lemon rice. Lastly temper for vaangi bath.
  6. Grind the vaangi bath masala powder and finish preparing the masala.
  7. By now both rice would have been done, cool down and carefully separate the grains and mash the rice for curd rice.
  8. Mix vaangi bath first, then mix lemon rice and lastly curd rice.
  9. Finally fry some vadams or fryums or appalams.
Here is the lunch with vaangi bhaat, lemon rice,curd rice, fryums and pickle.

vaangi bath lemon rice curd rice

Check out the recipes
  1. Vaangi Bhaat recipe
  2. Lemon rice recipe
  3. Curd rice recipe
  4. Koozh Vadam recipe
  5. Pickle recipes
Have a great weekend!Happy

Mango sorbet recipe | Mango recipes

$
0
0
mango-sorbet
Mango sorbet is a must try for mango lovers this mango season! This is so simple, easy with only 3 main ingredients – Mango, sugar and lemon. And it gives full satisfaction for mango lovers. Plus a treat for this summer. I made this for the second time after I loved it when I made it for the magazine. Since I loved it, I decided to post it here. Without any blah blahs, here is the recipe.
mango-sorbet-recipe

Mango Sorbet recipe

Recipe Cuisine:Indian  |  Recipe Category:Breakfast
Prep Time: 5 mins+ 10 hours freezing time     |  Cook time: 5 mins    Serves: 3

Ingredients


Mango pulp 1 cup 
Sugar 1/2 cup 
Water 1/2 cup 
Lemon juice 1 tblsp 

Method

  1. Slice the mangoes along the sides and scoop out the pulp using a spoon. Scrap the pulp from the seed as well and collect 1 cup of pulp. Place it in a blender, puree it first.1-scoop
  2. Make a simple sugar syrup by heating sugar and water and just bring to boil to dissolve the sugar completely. Cool down and blend it with the mango pulp, lemon juice.2-sugar
  3. Transfer to a freezer safe airtight container and freeze it for an hour. 3-freeze
  4. Take it out, mix it until smooth, with a fork. (For smoothest texture of all, you can grind the sorbet in mixie instead of mixing with fork).Repeat the same every half hour for 5 more times. Then freeze for 6 to 12 hours depending on your freezer temperature and conditions. Scoop and serve.4-scoop

Notes

    • If you have icecream maker, you can churn the sorbet as per the instructions. This will give you the best result of all - Smoothest sorbet, equal to icecream's texture.
    • I used alphonso mangoes for vibrant yellow coloured result.
    • Lemon juice not only adds a tangy taste, but also must be helping in its texture. So do not omit.
    • MIxing with fork every half hour for 5-6 times helps in smooth texture.

Freeze the serving bowls too for an hour before serving and scoop the sorbet to serve it.

homemade-mango-sorbet

Methi dal recipe | Methi dal with moong dal

$
0
0
methi-dal-recipe-1
I got a bunch of methi leaves in Mustafa last week when I went for monthly grocery purchase. With only 2 weeks to go to Chennai, when I was picking all the veggies, Vj reminded me there is only 2 weeks and as Aj too planned to travel alone prior to us, he told to buy accordingly. But since its 2 weeks, I had to buy as the vegetables as usual. I saw the methi leaves fresh and so bought and kept. I usually clean and freeze the leaves and use it for making methi thepla. I just love it a lot. Other than methi thepla, I rarely make aloo methi. Otherwise, I do not use methi in anything else. My MIL makes kootu with this as we call it vendhaya keerai kootu. But I have not tried that. I tried making methi pulao, which I will schedule next month before going to Chennai. I had half the methi leaves remaining, so I tried making this methi dal. It was really falvorful, I love all kind of dals, so loved this as well. It goes well with both rice and roti.
methi-dal-recipe

Methi dal recipe

Recipe Cuisine:Indian  |  Recipe Category:Side dish
Prep Time: 15 mins    |  Cook time: 20 mins    Serves: 3

Ingredients


Moong dal / Paasi paruppu 1/2 cup 
Methi leaves 3/4 cup 
Onion 1 
Tomato 2 
Green chilli  2 
Garam masala powder 1/2 tsp 
Turmeric 1/4 tsp 
Red chilli powder 1 tsp 
Ginger garlic paste  1 tsp 
Salt  As needed 


To temper

Ghee1 tblsp
Jeera / Cumin seeds2 tsp


Method

  1. Pressure cook dal with enough water for 3 whistles. Chop onion and tomatoes finely, slit the green chillies. Clean the leaves and keep it ready.
  2. Heat a kadai with ghee and add cumin seeds in low flame. Add onion and fry till transparent. Add green chilli (I didnt add), ginger garlic paste and fry for a minute in medium flame.
  3. 1-temper
  4. Add tomatoes, salt, turmeric, red chilli powder, garam masala powder and fry until tomatoes turn soft.
  5. 2-onion-tomato
  6. Add washed methi leaves and fry till its reduced in volume.
  7. 3-add-methi
  8. Add cooked dal, enough water (I added 1 & 3/4 cups) and let it boil for 2 minutes.
  9. 4-add-dal
  10. Let it be in low flame for 5 minutes or until the desired consistency reaches also the methi leaves gets cooked.
  11. 5-boil

Notes

    • Chopping the methi leaves or adding as such is your choice.
    • You can add either finely chopped ginger or garlic alone instead of ginger garlic paste.
    • If adding ginger, adding asafoetida will enhance the taste.
    • Add enough tomatoes for tanginess to supress the bitterness of the methi leaves.
    • You can add 1/2 tsp of manchoor powder if you are short of tomatoes.
    • If the tanginess and spice level is not balanced then it may taste bitter.

Serve with hot steamed rice or softphulkas!  Check out thedal tadka and dal fry recipe too...

methi-dal

Lunch Menu 40 - Pumpkin gravy, Chow chow curry, Sundal

$
0
0
lunch menu rakskitchen

I thought of posting a breakfast menu today and skipped posting lunch menu yesterday, but today morning went out for shopping for my trip and had no time making and clicking for breakfast menu. So after I came back from shopping, thought will make lunch and post lunch menu itself. So I am late Big Grin. I have a breakfast menu to post next week, but after that, I am not sure how much I can post in the lunch menu series regularly. So kindly bear with me. But I have posts for all the weeks when I am in India and I will schedule it and go, so stay tuned for some interesting summer recipes and others.
Todays lunch menu has Yellow pumpkin gravy, which we call as parangikkai chutney. Though its a gravy, its called chutney only. Its very easy and too good. So if you have not tried this yet, try this different and delicious gravy for rice and you will be surprised with the great taste. I want to empty my fridge so I am making all the possible things I can make and utilize the veggies without wasting before I go. Here is how I prepared this menu after I came back from shopping.

Lunch menu 40 – Pumpkin gravy, chow chow curry, sundal

Recipe Cuisine:South Indian  |  Recipe Category:Lunch
Prep Time: 30 mins + Overnight soaking    |  Cook time: 1 Hr    Serves: 3
  1. Soak channa (Chickpeas/ kondaikadalai) overnight. I had some soaked and frozen, so I used it up here.
  2. I kept rice in electric rice cooker. Soak tamarind in hot water. Peel and roughly chop the yellow pumpkin to chunks. In pressure cooker, two separate containers, pressure cook pumpkin and channa.
  3. Mean while everything is getting cooked, extract tamarind juice first, keep aside. Cut chow chow, chop onions for gravy and curry.Peel and finely chop garlic. Grate coconut for sundal and keep the other things like chilli and curry leaves ready.
  4. Once the pressure cooker is done, grind the pumpkin and prepare the gravy first and let it boil. Next, finish sundal and lastly curry.
Pumpkin gravy, chow chow curry, sundal, rice, curd and pickle for lunch!
yellow pumpkin gravy lunch combo

Check out the recipes
  1. Yellow pumpkin gravy recipe
  2. Chow chow curry recipe
  3. Channa sundal recipe
You can prepare the same gravy with ridge gourdtoo. Check out the other kuzhambu recipes.

Have a great day! 

Iced Lemon Tea Recipe - How to make ice lemon tea

$
0
0
iced-lemon-tea-recipe
I drink Iced lemon tea only when I go to cinemas. That too I got the habit from Vj. Not habit, but I say very firmly I don’t want any drink everytime, but what ever Vj gets, I have few sips from his drink Whistling. But few times I bought bottled iced green lemon tea and had it. I am allergic to tea, I sit like an owl in nights if I have tea, so I drink very rarely. For this summer, I always feel like having something icy cold after the house chores. Most of the time it will be nannaari sarbath with lemon as I have the syrup. But yesterday somehow felt like having ice lemon tea. But I wanted to make use of the lemons too before they get wasted, so made this today and made a post too Winking.
how to make ice lemon tea

Iced lemon tea recipe

Recipe Cuisine:International  |  Recipe Category:Drinks
Prep Time: 15 mins    |  Cook time: 5 mins    Serves: 1

Ingredients


Tea powder 1 & 1/2 tblsp 
Water 1 & 1/2 cups 
Sugar  2 tblsp (or as per ur taste) 
Lemon juice 1 tblsp 

Method

  1. Bring water to boil until it bubbles, then add the tea and boil in medium flame for 3 minutes. 1-boil
  2. Filter through a tea strainer and add sugar, mix to dissolve it. Cool down to room temperature. 2-filter
  3. Squeeze lemon in the tea. Fill a tall glass with ice and pour the tea over it and enjoy! 3-lemon

Notes

    • Add tea powder only after water boils for best results. Do not boil more than 3 minutes as it may turn strong and bitter.
    • Keep covered while the tea comes to room temperature to retain its flavor.
    • Adjust lemon juice and sugar as per your taste. I used one whole lemon’s juice.

Serve it icy cold, as it is ICED lemon tea. Also add ice cubes generously. Keep hydrated this summerCool.
ice-lemon-tea

ilaneer sorbet recipe - Tender coconut sorbet

$
0
0
ilaneer-sorbet-recipe
I made this ilaneer sorbet for the magazine, one among 30 recipes, but the moment I made and tasted this one, I decided I should blog this. I loved it so so muchLove Struck. It is one of the best I made it, I loved it more than the mango sorbet. It is best for this summer, good for you as well as tastes Out-Of-This-World!! The tender coconut is perfect to make a dessert. You would have heard about ilaneer payasam (tender coconut payasam) or may be tasted too. But have any one heard about or tasted ilaneer sorbet?? This is very very new and will make who ever tastes it for the first time, first spoon, to WOW. Its so soft, smooth and melts in mouth with amazing unbelievable taste. Its like eating a tasty, sweet snow Blushing. I know I am hyping too much, but sure this is worth a try. I too have never ever tasted this before I did it myself and had. I got this concept from a TV show which featured an icecream shop at chennai which serves unique icecream and sorbet flavors. So as a foodie and blogger, I am proud to present you this recipe. Simple with no fancy items, sure everyone can make this like a child’s play.
tender-coconut-sorbet

Ilaneer Sorbet recipe

Recipe Cuisine:Indian  |  Recipe Category:Dessert
Prep Time: 12 Hrs including freezing time    |  Cook time: 0 mins    Serves: 2

Ingredients


Tender coconut 1/2 cup 
Tender coconut water  1 cup 
Sugar 1/4 cup 
Lemon juice (optional) 1 tblsp 


Method

  1. First collect the tender coconut water and then cut open the coconut and scoop, collect the tender coconut using a spoon. Do not scrap the yellow part, gently scoop the tender coconut alone.
  2. 1-scoop,-grind
  3. Grind it with coconut water, sugar and lemon juice if desired until smooth. Transfer to a freezer safe box with lid and freeze for 3 hours.
  4. 2-freeze
  5. Take out every 1 hour after that and grind it smoothly. Repeat this hourly for 5 times minimum for a completely dream soft sorbet.
  6. 3-grind
  7. Then again freeze overnight and scoop and serve it the next day.
  8. 4-scoop

Notes

    • How much ever you grind the sorbet, you get the smooth texture like ice cream. I know its a messy job, but no other way. (think about the best part, licking it each time Tongue)
    • I used a fork to dig the sides of the frozen sorbet for breaking it for grinding. You can use any hard thing to do the same. I made very little so for was enough.
    • This recipe can be halved to make 3 scoops, like what I did.
    • I have made this without lemon and tastes great too. Actually I like it without lemon better as we get the full taste of the tender coconut.
    • You can make this by churning it in an ice cream maker as per the instructions given along it.

I freeze the serving bowls too before serving, it keeps the sorbet longer without melting. Helps in keeping it firm until I picture tooBig Grin.
ilaneer-sorbet


Grape popsicle recipe | Popsicle recipes

$
0
0
grape-popsicle-recipe
Grape popsicle is one of Vj’s most favorite popsicle. He is big fan of fruitare. He used to say me to try this, with few instructions too. One is he needed grapes halved and added to the popsicle along with the juice while freezing. So when I gave recipes to thozhi magazine, I made this grape popsicle as he told and clicked. As I was in a hurry then, I could not take stepwise pictures, so now made it again for this post. The best thing I love about fresh fruit popsicles is, it tastes great to bite and eat tooLove Struck. Here’s the popsicle you can make your kids also consume fruits this summer. This is a scheduled post and for a month from now its gonna be scheduled posts and I may not be able to answer your queries promptly, will sure reply when ever I find time. Looking forward for family time at India, excited! :)
grape-popsicle

Grape popsicle recipe

Recipe Cuisine:Indian  |  Recipe Category:Dessert
Prep Time: 12 hr Including freezing time    |  Cook time: 0 mins    Serves: 4

Ingredients


Grapes  2 cups 
Sugar 4 tblsp 
Water 1/2 cup 

Method

  1. Wash and reserve few grapes and grind the grapes with water. Filter it through a metal strainer. Add sugar and dissolve completely.
  2. 1-grape-popsicle
  3. Fill 3/4th of the popsicle moulds with this juice and add few sliced grapes in each mould.
  4. 2-grape-popsicle
  5. Cover it with the lid/handles that comes with the popsicle moulds, or like me, cover it with cling wrap, slit in middle, insert the popsicle sticks and freeze it for minimum 12 hours. Once frozen hard, show the body of the popsicle moulds under running tap water for 30 seconds to remove the popsicles easily from the  moulds.
  6. 3-grape-popsicle

Notes

  • You can do it without adding water too, but u may need to add more sugar as it would be more tangy.
  • If not frozen properly, the stick wont hold the Popsicle while you take out.
  • You can add ginger while grinding to give it a twist.
  • Adjust sugar quantity as per your taste.

Enjoy the Popsicle this hot summer and stay hydrated! Cool 
grape-popsicle-1

Rava kichadi, thakkali dosa - Breakfast menu 10

$
0
0
Rava kichadi
I made this menu last weekend to post, but somehow posted a lunch menu. If Aj is there then this menu is not possible. Since he is enjoying his vacation my in laws I made this menu and enjoyed. I felt like having kichadi with vegetables, so made it along thakkali dosai and enjoyed. Since I am going to Chennai, I am scheduling this post and will try to click any breakfast menu from there and post it if something new is made there. Otherwise, will post some basic recipes, so stay tuned. Heres how I prepared this breakfast.

Rava kichadi, thakkali dosai,Chutney,sambar

Recipe Cuisine:Indian  |  Recipe Category:Breakfast
Prep Time: 12 hr     |  Cook time: 45 mins    Serves: 4

  1. I soaked idli rice overnight and ground for thakkali dosa first and kept aside. Pressure cook dal for sambar, soak tamarind in hot water.
  2. Chop veggies, tomato, onion for kichadi, sambar and dosa, keep all other ingredients like green chilli, vegetable for sambar, curry leaves required for khichadi, sambar, chutney and dosa.
  3. Extract tamarind juice, keep aside. First temper for chutney and transfer to a bowl, then for dosa, then sambar, let it boil in a stove. Lastly prepare kichadi. Let it get cooked.
  4. Meanwhile you can grate coconut for chutney and grind it, mix with the temper.
  5. When kichadi is done and your family is ready, prepare dosa and serve hot.
Thakkali dosa, rava kichadi, chutney, sambar for weekend breakfast.
tomato dosa, rava kichadi

Check out the recipes
  1. Tomato dosa recipe
  2. Rava kichadi recipe
  3. Coconut chutney recipe
  4. Tiffin sambar recipe
Check out this similar verum arisi dosa, other chutney recipes too.
Have a happy Sunday Love Struck.

Mango ice cream recipe with tutti frutti

$
0
0
mango-ice-cream
This is the first ice cream recipe I am posting for this summer. when summer started, many readers suggested posting homemade ice cream recipes. I did few for the magazine book, but didn’t thought I would make again and post here. But Mango ice cream is too hard to resist posting. Vj also is a mango lover, so I  made it again last week. I added few raisins and tutti fruity when I made first time and it was a great addition to the ice cream. This time I just added tutti fruity alone. I just love it in the ice cream a lot. With the fresh smell of mango, the ice cream comes out really rich and creamy. You can follow the same recipe in ice cream maker too. But this one is done without any ice cream maker.
homemade-mango-ice-cream

Mango Ice cream recipe

Recipe Cuisine:Indian  |  Recipe Category:Dessert
Prep Time: 12 Hrs freezing time    |  Cook time: 0 mins    Serves: 8 scoops

Ingredients


Alphonso mango 2 
Sugar  3/4 cup 
whipping cream 1 cup 
Tutti frutti   4 tblsp 
Milk 1/2 cup 


Method

  1. Scoop and collect pulp of mango with a spoon and place it in a blender with sugar, milk and blend well until sugar is dissolved. 1-mango-ice-cream
  2. Add whipping cream and whip for a minute or until all the ingredients are mixed well. 2-mango-ice-cream
  3. Pour into a broad, freezer safe airtight box. Freeze it for 3 hrs. 3-mango-ice-cream
  4. Take out and grind again in a mixer until smooth and repeat the same every 1 hour for 4-5 times. 3-mango-ice-cream
  5. Last time add tutti frutti and freeze for 6 hrs or overnight. Scoop and serve. 5-mango-ice-cream

Notes

  • Adding tutti frutti is optional and you can skip it.
  • If you do not get whipping cream you can try using regular cream too. But this tastes best.
  • Grinding few times ensures soft texture of the ice cream, so make sure you grind it and dont mind the mess.
  • You can use ready made sweetened mango pulps available in tins. Reduce sugar accordingly.

Best dessert one can make with mangoes. Arent the tutti fruttis tempting you to pick and eat?
mango-ice-cream-recipe

Masala coke recipe | Masala soda drink

$
0
0
masala-coke
Masala coke is a totally new drink to me until I made it as popsicle for the magazine. I loved it when I made it as popsicle. My mom used to say when I was a kid that it would taste good when we mix salt in an aerated drink, it would taste good. And I have seen my BIL does the same to remove the gas from the aerated drink as he doesn't like it. But this one just amazed me when I tried first time. If you do not have any other ingredients and only chaat masala with you, still you can try this with chaat masala alone and it tastes great. I had no patience to make and click masala coke popsicles for blog, so I am just posting it as a drink here. I got this cute limited edition bottle (world cup) few weeks back, which is just in a shape of football and wanted to make use of it as a propBig Grin.

masala-coke-1

Masala Coke recipe

Recipe Cuisine:Indian  |  Recipe Category:Drink
Prep Time: 5 mins    |  Cook time: 0 mins    Serves: 2

Ingredients


Any cola drink 2 cups 
Chaat masala  2 tsp 
Kala namak 1 pinch 
Roasted jeera powder  1/2 tsp 
Black pepper powder (optional) 2 pinches 

Method

  1. Cool the cola drink until you are going to prepare the drink. I used coke zero, but you can use any brand. In a tall jar or big enough container, place all the ingredients except the coke.
  2. 1-ingredients
  3. Pour the coke slowly and it will bubble and raise very much, so let the container you use be apt for that.
    2-pour
  4. Mix gently and immediately pour over ice to serve.
  5. 3-mix

Serve immediately. Best after a dinner treat. You can make this easily for any party, get together, game nights. masala-cola-drink

Baingan Bharta Recipe | Baingan bharta

$
0
0
baingan-bharta-recipe
I made this Baingan Bharta recipe for the first time. It was in my handwritten cookbook. But was sceptical how it would be. When I tried sutta kathirikkai chutney, though I liked it, the smoky smell was very dominating. I was thinking how it would be as side dish if I make it the same way as a side dish for roti/ phulka.  So I kept postponing. Now when I was thinking what to schedule for this month when I am in India, I though I can try this and see and post if its good. And to my surprise, it was amazing! I felt why I compared the sutta kathirikkai chutney when this has loads of masalas and onion, tomatoes. It was so rich inspite of the fact, it had nothing fatty. I had a lot without any guilt Happy.
baingan-bartha


Baingan Bharta recipe

Recipe Cuisine:Indian  |  Recipe Category:Side dish
Prep Time: 20 mins    |  Cook time: 15 mins    Serves: 2

Ingredients


Aubergine/ eggplant 1
Onion 2 
Tomato 3 
Ginger garlic paste2 tslp
Red chilli powder2 tsp
Garam masala powder1 & 1/2 tsp
Turmeric1/4 tsp
Chopped coriander leaves2 tblsp
Salt As needed


To temper

Oil2 tblsp
Jeera1 tsp


Method

  1. Wash, remove the stalk of the aubergine by cutting that part. Pat dry with a clean kitchen towel, apply oil all over the aubergine and cook it over medium to low direct flame. I used my paniyaram turner metal stick for this to hold it. Turn it often for even cooking. Make sure the heat is moderate so that it is not burnt outside and uncooked from inside. Cool down and peel off the skin. It comes out very easily if its cooked properly and evenly.1-raost
  2. Mash it/ tear it roughly and grind it in a mixer. Smooth or rough its up to you, but I did smoothly.2-peel,-grind
  3. Heat a kadai with oil and temper with jeera. Add finely chopped onion, fry till transparent. Add ginger garlic paste and fry for a minute.
  4. Add finely chopped tomatoes, salt, 1/2 tsp of garam masala, red chilli powder and turmeric. Fry till everything becomes mushy.4-masala
  5. Add the ground aubergine and 3/4 cup to 1 cup water and mix well. Let it boil in low flame for 5 minutes. Stir in between for even cooking.5-baingan
  6. Lastly heat 2 tsp of oil, switch off the flame, add garam masala immediately and stir it. Pour it to the gravy and mix well. Add coriander leaves lastly and mix well.6-ready 

Notes

    • Cooking the aubergine in moderate heat is very important. If the brinjal is uncooked, then it may taste bitter.
    • You have to add enough tomatoes too, otherwise bitter gravy.

While serving, you can top with chopped onions and more coriander leaves, with a squirt of lemon. Best with phulkas and rotis.
baingan-bharta

Watermelon granita recipe | Summer recipes

$
0
0
watermelon-granita-recipes
Another easy peasy summer treat! Big Grin  Watermelon by itself is a great thirst quencher. I wanted to make this granita for long time since I thought watermelon will be great when made as granita. And yes it was perfect when I made as granita. Its like heaven when you have it on a hot sunny day when you are thirsty and craving something cold to have. Vj and me totally loved it. Here is the simple recipe, try this and impress your family and friends. I saw this recipe idea as a Popsicle here and adapted slightly, tried as granita.
watermelon-granita-recpe

Watermelon granita recipe

Recipe Cuisine:Indian  |  Recipe Category:Dessert
Prep Time: 12 hrs    |  Cook time: 0 mins    Serves: 2

Ingredients


Watermelon chopped 4 cups 
Sugar 1/4 cup 
Mint leaves 6 
Lemon juice 1 tblsp 


Method

  1. Place everything in a blender and blend until smooth. Pour in a freezer safe broad container. Freeze for an hour and again take it out, wipe the sides inside the box especially corners, that would have started to freeze. 1-grind
  2. Repeat once again after an hour. Again freeze overnight or minimum 6 hours and use a fork to scrap the frozen mixture and serve immediately. 2-freeze

Notes

    • Do not add more mint leaves as it will over power and ruin the taste.
    • While freezing, refrain opening the freezer door often.
    • Granita is supposed to be grainy, so make sure you scrap with fork and there should not be any lumps too.

Serve as soon as you scrap as it will melt very fast, then it will loose the texture.

watermelon-granita

Methi pulao recipe | Methi recipes

$
0
0
methi-pulao-recipe
I bought a bunch of methi leaves when I went to shop at Mustafa and it was fresh, so too hard resist buying. I was thinking what else to make other than making methi thepla. Then made pulao in my own way and turned out easy yet very flavorful and makes a perfect lunch box recipe. Since I made only for us two, I made it in my non stick kadai itself. It was perfectly done and super easy. Sure to follow this method when I make this kind of pulaos.
methi-pulao-2

Methi pulao recipe

Recipe Cuisine:Indian  |  Recipe Category:Lunch
Prep Time: 45 mins    |  Cook time: 20 mins    Serves: 2

Ingredients


Basmati rice 1 cup 
Methi leaves 1 cup  
Green chillies  2 
Red chilli powder 1 tsp 
Coriander powder 3/4 tsp 
Amchoor powder 1/2 tsp 
Salt  As needed 

To temper

Ghee1 tblsp
Cinnamon 1 inch piece
Cloves1
Cardamom1
Bay leaves1

Method

  1. Soak the rice in warm water for atleast 30 mins. Heat a pressure cooker (I did in my non stick kadai itself) and add ghee, temper with the items under ‘To temper’ table. Add the cleaned methi leaves. 1-temper 
  2. Fry in medium flame until it shrinks in volume without changing its colour. Add green chillies, red chilli powder, coriander seeds powder, amchoor powder, salt and give a quick stir.2-fry
  3. Add water(1 & 1/2 cups) and bring to boil. Add the soaked rice and bring to boil again.3-add-water 
  4. Keep the flame in lowest possible and cook covered for 10 minutes or until the water is fully dried up.4-cook
  5. Stir only once in between, carefully for even cooking.5-cooked

Notes

    • Soaking in warm water is very important as it helps the rice to get cooked in short time and also helps in giving long grain.
    • Do not stir much after the rice gets cooked, just do it on between once for even cooking.
    • If you are cooking in pressure cooker, after the water boils, close the lid and cook in lowest flame for 10 mins. Or if whistle, use 2 cups water and let 2 whistles in medium flame.
    • If you don’t have amchoor powder, use 1 tsp lemon juice in place of it.
    • Do not chop the leaves as it may turn bitter while cooking.

Serve hot with any raita or dal or any gravies. I had simply with raita and pickle. It was great and flavorful.
methi-pulao


Eggless carrot muffins recipe | Eggless baking recipes

$
0
0
carrot-muffins
I made these muffins a long time back, but saved for posting this time when I am on vacation as I knew I would be short of posts. I really loved the simplicity of this recipe when I saw this here in this blog. It was tasty, healthy with no maida – with carrots and wheat flour and no butter, only oil so lower in fat too. What else we need. I had these myself for snack without any guilt. You can also try this for your family for their snack and sure they are going to love this. Its been a long long time since I posted any baking recipes, so this one is perfect to break the break, stay tuned for more eggless baking recipes! I am enjoying my vacation at mom’s place and I really sorry, could not respond to the flowing mails and comments. Soon will respond to all you queries!

carrot-muffins-recipe

Eggless carrot muffins recipe

Recipe Cuisine:Continental  |  Recipe Category:Snack
Prep Time: 15 mins    |  Cook time: 18 mins    |  Makes: 8

Ingredients


Wheat flour / Atta 1 & 1/4 cup 
Curd / plain yogurt 1 cup 
Grated carrot 3/4 cup 
Sugar 3/4 cup 
Oil 1/4 cup + 2tblsp 
Baking powder 1 tsp 
Baking soda (Sodium bi carbonate) 1/2 tsp 
Vanilla essence 1/2 tsp 
Salt  A pinch 

Method

  1. Gather all the things required to the counter top. Preheat oven to 180 deg C. Mean while wash, peel and grate carrots. Keep aside. Sift flour, baking powder, baking soda and salt in a bowl. This is to ensure even mixing.
  2. 1-grate-carrots
  3. In another mixing bowl, using a whisk mix well curd and oil.
  4. 2-wet-ingredients
  5. Add sugar, vanilla and mix until it is dissolved.
  6. 3-mix-sugar
  7. Add the sifted flour mixture (dry ingredients) and mix gently. Do not over mix.
  8. 4-mix-flour
  9. Lastly add carrots and fold (mix gently) the mixture so that carrot is mixed with the batter.
  10. 5-mix-carrot
  11. Line a muffin tray with muffin liner (I use two for better looks) and pour batter until 3/4 th of it. Make sure to spoon equal amount of the batter in all the muffin liners.Bake for 15- 18  minutes or until a tooth pick inserted comes out clean. Cool over a wire rack before storing. Keeps good at room temperature for 2 days.
  12. 6-baked

Notes

  • Any cooking oil can be used, I used sunflower oil. Other than this, Canola, olive oil or vegetable oil is recommended.
  • Do not over mix after you add the dry ingredients.
  • Bake immediately once you prepare the batter.

Soft, tasty, healthy muffins, perfect for breakfast or for your kids snack box or as kids evening snack.

eggless-carrot-muffins


Schezwan noodles | Shezwan noodles recipe

$
0
0
schezwan-noodlesI now a days prefer schezwan recipes when it comes to Chinese cuisine. Fried rice and hakka noodles became very usual and all I need is some spicy stuff, so I prefer schezwan fried rice or noodles these days. Love the spiciness, garlic flavor and the fiery red hot colour too. I made some schezwan fried rice, had the chilli paste, so wanted to try noodles as well. I loved the noodles more than the rice. I assure about the taste, though the method may not be the same as it is supposed to be made.  
schezwan-noodles-spicy

Schezwan noodles recipe

Recipe Cuisine:Oriental  |  Recipe Category:Dinner
Prep Time: 15 mins    |  Cook time: 15 mins    Serves: 2

Ingredients


Plain noodles A small bunch* 
Cabbage, finely chopped1/2 cup
Carrot  1 small, finely chopped/ julienne 
Baby beans/ beans 10, finely chopped 
Garlic, finely chopped 3 tblsp 
Dry red chilli 1 
Spring onion (optional) To garnish 
Sugar 3/4 tsp 
Olive oil/ sesame oil 4 tblsp 
Salt & water As needed 

*Say roughly 1 inch diameter.

Method

  1. Boil enough water and cook the noodles as per the package instructions. It hardly takes 4-5 minutes after you add the noodles to the boiling water. Drain and wash immediately to prevent sticking to each other.1-cook
  2. Soak red chillies in hot water for 30 minutes or boil water and add the chillies, cook for 5 minutes. Cool down and grind to a paste. Make sure to grind properly. 
  3. Finely chop all the required garlic, vegetables and keep all the other ingredients ready.Heat a kadai with enough oil, add a red chilli followed by the chopped garlic. Fry just for a minute,taking care, not to change its colour.Do not over fry. Add the chilli paste.2-fry
  4. Give it a fry for minute over medium flame until the oil separates. Add chopped carrot and beans first, fry for 30 seconds in high flame, then lastly cabbage. 3-cook
  5. Stir fry for a minute over high flame. Add sugar, salt, chilli sauce, soya sauce, pepper powder.Stir quickly and add the cooked noodles. 4-add-noodles
  6. Mix or toss well so that everything gets mixed up evenly. Adjust salt, pepper and add oil if needed. Transfer to the serving bowl. 5-ready

Notes


  • If noodles get stuck to each other before you add along with veggies, just sprinkle some water to loosen it. 

  • You can add spring onion in this recipe, finely chopped – white part after garlic, green part finally for garnish. 

  • You can add sugar as soon as you add veggies to retain its colour, taste and crunchiness. 

  • You can grind the chilli paste ahead and store in refrigerator and use it as needed (just for the sake you cannot grind too little chilli to make smooth paste). 

  •  Do not over fry garlic as it will not lend the flavor we need for this recipe. 

  •  Adding lots of garlic is must for this recipe. Otherwise no flavor.  

  •  Sesame oil and olive oil works best for this.
Serve hot as such or any manchurian side dish like Gobi manchurian, baby corn manchurian or veg manchurian gravy. You can also try chilli paneer dry or chilli paneer gravy as side dish.
schezwan-noodles-recipe

Indian style veg sunny side up in capsicum

$
0
0
vegetarian-sunny-side-up-in
Ever since Sowmya (a reader, who is a great photographer) asked me to come up with a vegetarian version by sending the sunny side up in these colourful capsicums, I really wanted to make something and post. But never dared to try. Now a month back, I tried besan cheela within these and it tasted awesome. But I wanted to replicate the looks of sunny side up in the colourful capsicums. So came up with this idea. It may not be great idea , but I am happy for trying :) If you have tri coloured capsicums, you can make these for your kids as snack. You can also try the besan flour version. I closed and cooked these so, it got fried downside and got steamed on the upper side. If you want, you can flip, but I wanted the batter to maintain its white colour, so I covered and cooked.
masala-dosa-in-capsicum

Vegetarian sunny side up in capsicum recipe

Recipe Cuisine:Indian  |  Recipe Category:Breakfast
Prep Time: 15 mins excluding batter prep    |  Cook time: 5 mins   per batch Serves: 3

Ingredients


Tri coloured capsicum 1 in each colour 
Idli dosa batter 2 cups 
Potato masala 3/4 cup 
Coriander leaves as need for garnish 
Oil  As needed

Method

  1. Slice the capsicum carefully without breaking. Use big and sharp knife. Let it be thick enough to hold the batter.
  2. 1-capsicum
  3. Heat a tawa and smear with some oil. Arrange the capsicums. Pour the batter into each carefully.
  4. 2-arrange
  5. Let the flame be in low. Spoon the masala in the centre of each, make sure you do not disturb the white part/ shape.
  6. 3-masala
  7. Cook covered in low flame, add more oil if needed and check if its done by inserting tooth pick or knife carefully and use a spatula to take it out. Flip if desired.
  8. 4-cook

notes

    • Make sure flame is the lowest to ensure cooking.
    • Do not cut the capsicum too thick as you  may end up using more batter, then getting cooked will be a problem.
    • If flipping, no need to cook covered.

Serve hot with chutney and sambar. I served with sambar alone. It was good like a steamed masala dosa. You can make thiscarrot chutney as side dish to make it more colourful.
indian-style-veg-sunny-side up

Blueberry pancakes | Blueberry pancake recipe

$
0
0
blue-berry-pancake1

I made this one for Thozhi Magazine's step by step series. Yes! my step by step pictures and recipes are getting published in Thozhi magazine monthly. Though I do not post all the recipes here, I loved to have this one in my blog here as this is a simple and tasty pancake recipe. This is just adding blueberries to the regular pancake batter. Perfect for kids and adults. I am sure this recipe would help all those who hate pancakes just for the sake that it is too eggy for them, coz this is eggless!! :)

blueberry-pancake-3

Blueberry  Pancakes recipe

ContinentalBreakfast

Prep Time: 10 mins    |  Cook time: 15 mins    Makes: 6

Ingredients

All purpose flour/ plain flour 1 cup 
Fresh blueberries 3/4 cup 
Milk 1 cup 
Sugar 1 tblsp 
Salt 1/2 tsp 
Butter 1 tblsp 
Baking powder 1 tblsp 
Butter and honey For topping  

Method

  1. Place the dry ingredients in a bowl. Mix well with whisk, you can also sift.
  2. 1-dry-ingredients
  3. Add the wet ingredients - melted butter, milk and mix until smooth and no lumps are there. The consistency should be like idli dosa batter.
  4. 2-mix-wet
  5. Add blueberries and mix gently. Keep aside for 10 minutes.3-add-blueberry
  6. After ten minutes, heat an iron skillet preferably for even cooking and heating and switch off the stove and leave it for 5 minutes. Again switch on the flame and put it in medium flame. Grease with butter and pour one big ladle full of batter carefully. Do not spread. 
  7. 4-pour-on-tawa
  8. Wait until bubbles pop over the pancakes and the colour changes and flip carefully. Cook the other side for a minute and transfer to serving plate.5-cooked
Notes
  • Iron skillet (Iron dosa pan) works best to get golden brown colour and even cooking.
  • If you want you can cover and cook after flipping, this makes it even more soft and locks the moisture.
  • If you heat the pan really hot and make the pancake immediately, the pancakes turn dark brown in colour. That’s why I have heated the pan and switched off for a while to bring the temperature medium. ( I saw this in a video in you tube)
  • If the pan is too hot, the pancakes will have edges like flower. that is it wont be a perfect circle. So make sure to keep the heat medium.
  • Use a big ladle, so that for all the pancakes, you use only one and so all of them would be on same size.
  • You can use whole wheat flour as well, but experiment with the milk volume as it may take more.
  • You can add cinnamon or vanilla essence to make it more flavorful.
  • You can make this same with non diary milk and make it vegan.

You can stack and keep them to keep it hot and the topping can be honey or butter depends on you taste :)

blueberry-pancake-2

Pirandai thuvaiyal recipe | Pirandai chutney for rice

$
0
0
pirandai-thogaiyal-recipe
When I went to India this year, after all the travels to temples and relatives house, we decided to go to my mom’s place. By then, coz of all those travels, Vj’s tummy got upset. What ever he eats, he got heart burning. So immediately my mom went to her mini garden and picked some of these pirandai (Cissus quadrangularis ,known as Hadjot in Hindi) and made thogaiyal out of it. Pirandai has various health benefits out of which, it is good for heart burn. My mom gave a lot of pirandai to carry to Chennai and suggested me to plant one or two in the plant pot so that it will be lively and I can carry it to Singapore. I planted it in the pot, but I have not brought it here, coz, I was afraid if we could carry plants through air. Also I forgot, I should agree. So left it there. But I am not sure how it will grow and get utilized. But we made again pirandai thogaiyal at Chennai. So I took the opportunity to click picture for my post. My MIL and mom said we can make adai also out of it. But this time only thogaiyal and wish to try adai next time. And if you know about this plant, please let me know how you call it in your region, in your language – in comments section, thank you.

Pirandai thogaiyal recipe

Recipe Cuisine:Indian  |  Recipe Category:Lunch- side dish
Prep Time: 15 mins    |  Cook time: 15 mins    Makes: 3/4 cup

Ingredients


Pirandai, cleaned & chopped finely1 cup 
Red chilli, long variety  6 
Urad dal 1/4 cup 
Tamarind 1/2 tsp tightly packed 
Asafoetida 1/4 tsp 
Salt  As needed 
Sesame oil 2 tblsp 


Method


  1. First cut the pirandai at each nodes and using a knife, scrap the sharp thin edges.Careful with this as it could be an itchy process or even sometimes irritates the skin. Then chop it into small pieces.
  2. 1-pirandai
  3. Heat kadai with little and roast chilli, urad dal and asafoetida until urad dal is golden in colour. In the same kadai, add rest of the oil and sautee the chopped pirandai well in medium flame with constant stirring, until the colour changes pale.
  4. 2-fry
  5. Cool down and first powder chilli, salt, tamarind, asafoetida into a coarse powder. Later add the sauteed pirandai.
  6. 3-roast
  7. Grind coarsely. Add little water and grind again. Now it will be bit smooth to look.
  8. 4-grind
  9. Lastly add urad dal and grind to a coarse thick paste. Check for salt and transfer to the serving bowl.
  10. 5-grind

Notes

    • Make sure to use only the finger tips to avoid itchy and sore fingers.
    • The pirandai should be sauteed well otherwise it will be even itchy in your tongue.
    • Make sure to remove the sharp edges as well. The nodes also should not be included.

Mix with hot rice and ghee or sesame oil generously. It tastes same as thengai thogaiyal, you won’t believe.

pirandai-thogaiyal
Viewing all 1220 articles
Browse latest View live